WASTE INVADERS
2D beginners track
Waste Invaders is a 2D shooter where you pilot a waste management spaceship tasked with shooting down garbage raining down on the earth. It is a simple 2D project which is ideal to learn the game development pipeline from start to finish.
We cover everything from how to set up your first project and scene, all the way to exporting your finished product. You can follow along, with assets we have provided or make your own. Either way you'll have a lot of fun learning how to make this exciting game.
Just Starting?
If you're just beginning, follow the tutorial on how to make your first project and create your first scene with Redot And then come back to this track.
recommendation
We recommend that you name your project something similar to 'waste invaders' unless you have a cool name in mind.
Create your first project
Once we have set up our project we will want to create our first scene, to learn how to do this, follow the tutorial below and return to this track when you are ready.
Create your first 2D scene Creating our first scene is the first step in the door towards our finished game. Though a small step, remember;
One who moves a mountain begins by carrying away small stones.
2D World Essentials
Our first scene will need a few things before our game will run. Initially most 2D games need the following:
- a useable screen resoultion
- a 2D camera
- an awesome background
2D Resolution and Camera
To setup our first camera and screen resolution you should follow the Setup 2D Camera Tutorial, then return to this track.
Because we are making our game for PC, we should set the viewport resolution to 1920x1080 as shown in the tutorial above. The camera will give the player something to see our cool game world through, but right now there isn't much to see. For that we need a background.
Choosing a background
The background in 2D games is very important. Our game can use anything from just a block of color, a photograph of a blowing desert scene, or the earth and stars like our example asset.
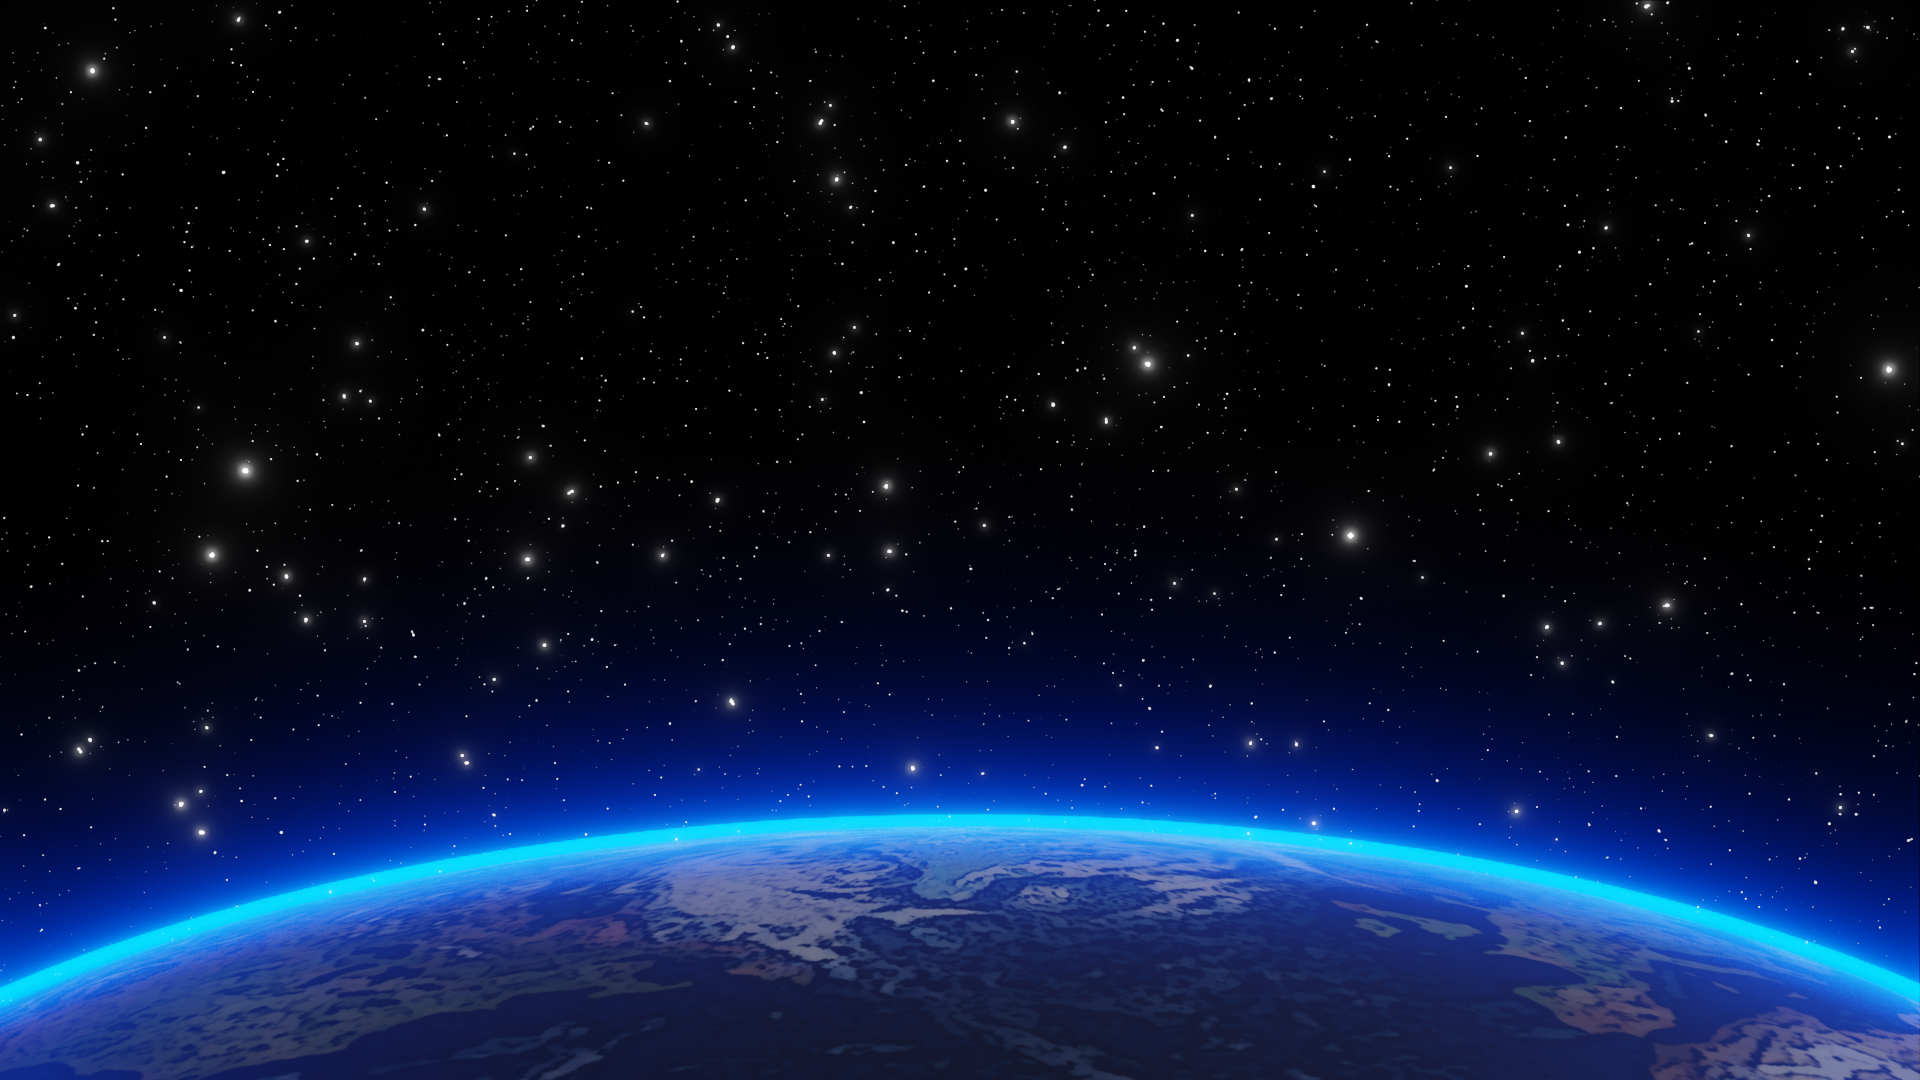 Feel free to use our background asset above by shrinking your browser to a smaller window, and while on our website, drag the image from the browser into the
 Redot FileSystem bottom left.
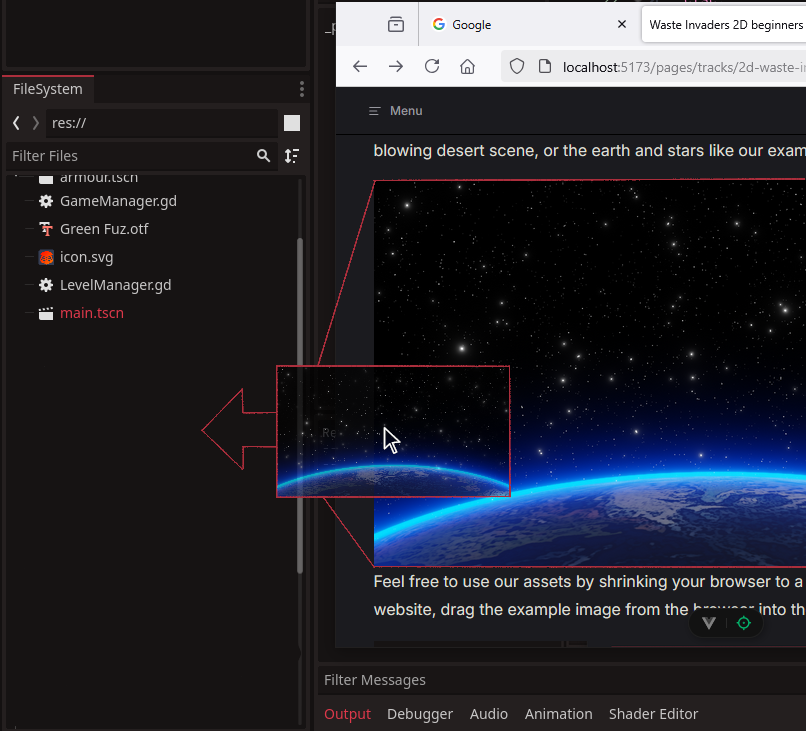
It may come with a strange name, so rename it to anything you like.
If choosing your own image, you will want it to be the same size as your screen resolution, so there are no blacklines down the sides or stretching going on. Once you've chosen a suitable background and added it to the Redot file system, we need to add it to our scene.
Adding and adjusting our background
In Waste Invaders, our camera will not move, and neither will our background, so using a single sprite2D for our background will suffice. To add our background sprite and learn more about sprites, check out this tutorial, A Quick Word On Sprites then return to this track.
once our background sprite is created, image assigned, and the centered box is checked, we can take a first look at our game.
Press play above the inspector top right to run a test of the game. 
If all was setup correctly, we should see the background sitting perfectly inside our viewport window. If so, congratulations! Your game has run successfully for the first time!
Our First Lines of Code
Now we have the basics set up and ready for play, we need some functionality in the form of code. For our game we will need two specific managers.
- A
GameManagerto handle our gamestate, creating new games, and choosing levels - A
LevelManagerto handle what happens in each level of our game.
Both of these managers will be a type of script, but differ slightly with implemention.
The Game Manager
A good way to get started is to look into the GameManager tutorial. This will help you set up our two manager scripts that will be essential to our game's function.
Once you've followed all you can in the GameManager Tutorial, return to this track. If you haven't already added the GameManager to the Autoload system, follow this tutorial Autoloading scripts then return here.
You can open your GameManager script by double clicking it in the file system, in the bottom left. This script will automatically come with some functional code already in it, as shown below.GameManager.gd
extends node


# Called when the node enters the scene tree for the first time.
func _ready() -> void:
	pass # Replace with function body.


# Called every frame. 'delta' is the elapsed time since the previous frame.
func _process(delta: float) -> void:
	pass
Our game will not require most of this code, so you can delete everything in red, but leave the first line that says extends node.
From here we want to add these two lines of code, highlighted in green below:
GameManager.gd
extends node

var isGameRunning : bool = false
var level : int = 0
Our two lines of code achieve the following:
isGameRunning- will be our gamestate, we only really need to know if the player and enemies can move or not.level- this is the level number, our game will create enemies on levels 1 - 5, but 0 will be our mainmenu
Level Manager
Next lets open the LevelManager. Just like we did with our GameManager script, delete all the code there except for the top line. Then add these lines of code, highlighted in green below:
LevelManager.gd
extends Node

const playerOrigin : Vector2 = Vector2(0, 465)
const enemyOrigin : Vector2 = Vector2(0, -830)
These two lines state where the player and enemies are going to start the game. The Player's y:465 is around the bottom of the screen. The enemies y:-830 is quite far above the top of the screen. The x:0 for both is the centre of the screen. This is on purpose as we want the enemies to spawn out of sight, and appear to fall into the screen like they're breaching the earth's atmosphere.
Excellent work! We now have a working gameState so we can tell whether the game is playing or not. We know the level we are on, and we know where the player and enemies are going to start.
Our Fearless Player and Trash Fighter
The time has come to add our player into the game. We are going to need to do a few things to accomplish this.
- create a new 2d player character
- create a death sprite for our player
- give our player functional code
Create a New 2D Player
We have a great tutorial on how to get a 2D player started with controls and all, so head over and check that out, before returning to the track. 2D Player Tutorial
We have supplied a few art assets if you wish to use these for your player Sprites.
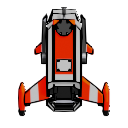
 You can drag these into your
 Redot project the same way you did with the background image asset.
Create a Death Sprite
Once you have created the basic player character from the tutorial, we're going to make a few changes specific to 'Waste Invaders'
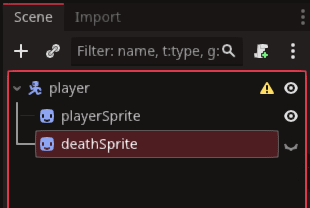
Firstly if you want a death sprite for your player, right-click the playerSprite and select duplicate. 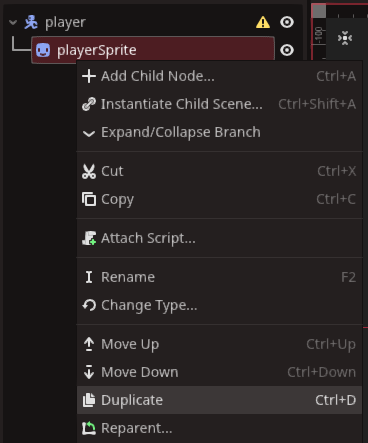
After the new playerSprite2 appears, rename it to deathSprite. When we create code for this later, the image will flash for a quarter of a second when the player dies. There is an art asset we have provided of an explosion you can use.
Once done, click to hide the deathSprite. It is a small round white open eye circle, just after the name. It looks like a closed eye when its hidden.
Some functional code for our Player
Next we need to modify the code in our player script. There are threee main reasons for this:
- Waste Invaders is in space and gravity will not affect the player.
- The player will be moving along the x-axis and not up and down
- The player is a spaceship and will not use the 'jump' function
You'll need to delete about half of the code in player.gd. Shown below, we need to keep the green highlighted code, while removing the red.
player.gd
extends CharacterBody2D


const SPEED = 300.0
const JUMP_VELOCITY = -400.0


func _physics_process(delta: float) -> void:
	# Add the gravity.
	if not is_on_floor():
		velocity += get_gravity() * delta

	# Handle jump.
	if Input.is_action_just_pressed("ui_accept") and is_on_floor():
		velocity.y = JUMP_VELOCITY

	# Get the input direction and handle the movement/deceleration.
	# As good practice, you should replace UI actions with custom gameplay actions.
	var direction := Input.get_axis("ui_left", "ui_right")
	if direction:
		velocity.x = direction * SPEED
	else:
		velocity.x = move_toward(velocity.x, 0, SPEED)

	move_and_slide()
This should give our player a steady left and right movement with the left and right arrow keys. Its about time we tested this, so to do so we need to open the LevelManager script.
We're going to add the lines of code highlighted below.LevelManager.gd
extends Node

var playerScene : PackedScene = preload("res://player.tscn")

var playerOrigin : Vector2 = Vector2(0, 465)
var enemyOrigin : Vector2 = Vector2(0, -830)

func _ready() -> void:
    CreatePlayer()

func CreatePlayer():
	var player = playerScene.instantiate()
	player.position = playerOrigin
	add_child(player)
To explain this code a little, this is what these new lines of code accompish.
- holds a copy of the playerscene so it can be called up at runtime.
- calls the
CreatePlayer()function right after ourMainnode andLevelManagerare loaded at runtime. - Creates the playerScene, and adds it to the scene in the position we have set
As mentioned in the GameManager tutorial, the GameManager initiates the start of a level, but it is the LevelManager that creates a new player at the start of each level.
now if we run our game we should see our player at the bottom of the screen and be able to move them right and left with the arrow keys.